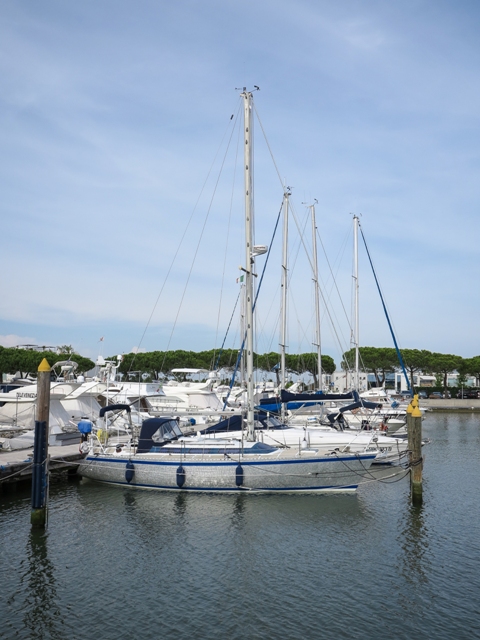

Jesolo 2014
|
Jesolo 2014
|
|
|
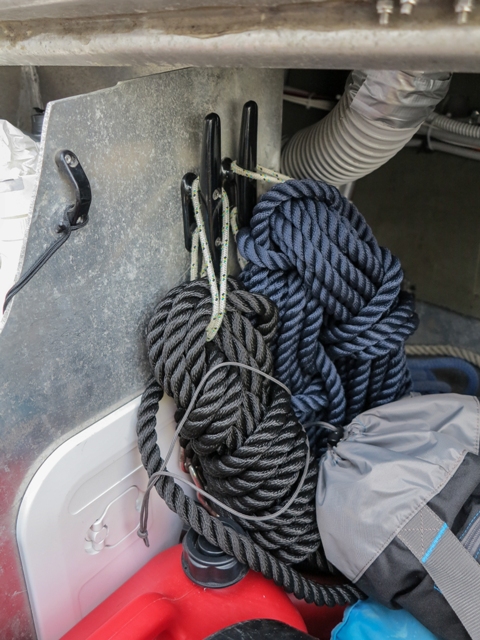
The new season has come! Temperatures are beginning to rise, the house in Jesolo is back into operation, and we can resume works from where we left them. WHERE WERE WE? The to-do list is impressively long: first of all, the works requiring the boat out of the water: - replace the keel's lifting cable and trim the keel's play - replace the anchor and check/replace the chain - take advantage of the engine's absence to clean and fix the engine-bay, prepare the installation of the new teleflex control lever, empty and clean the fuel tank and maintain the prop-shaft and its bearings - take advantage of the mast down to install steps, radar dome, wind transducer, the new tri-color+anchor light, the VHF aerial - paint the stern (and put the new name on it!) and possibly the deck and coachroof - polish the topsides (with a polisher, or will we need a sand-blaster?) - grind or scrape-off the old antifouling paint - apply fresh antifouling, making sure to straighten the present waterline which is quite wavy! - and finally, at the time of launching, reinstall the engine and the mast (with new rigging) the list then continues with the works that can be done with the boat afloat: - complete the electronics installation (connection of radar and wind-transducer to the chart area, install a new chartplotter on the coachroof, install the autopilot control unit) - revise the fresh-water system, removing the current two 60-liter canisters and putting back in service the existing 2 x 200 lt tanks - redo the gas system, installing a compliant gas-bottle housing, running a new pipe and installing all ancillary devices (gas leak detectors, taps, etc.) - paint the cabin interior (furniture and floor) and in case replace wooden parts which are too worn for repair - replace the sheet winches - build a new cockpit grating and seating - interior improvements: new lockers and cupboards, new lining in the aft cabin - replace the cushion covers - replace mainsail and genoa.... ..........it's impossible, we will NEVER be able to do all this before next winter!! OK then, let's begin with: ANCHOR REPLACEMENT:
The (12 Kg?) CQR anchor that is currently on board is a bit rusty but serviceable; on Shaula2 we used for years a similar one and we were happy with its performance, and on Shaula3 we switched to a DELTA only because the CQR we initially installed was dangerously jamming on the bow roller. The experience of dozens of anchorages around the world with the Delta has given us a great confidence in this anchor, so it was quite obvious for us to install a 16-kg one in place of the old CQR that we will keep as a spare. We still have to check the chain: we have 100 meters of it,
but we noticed that after the first 60/70 meters there are several badly
corroded links, so we will have to cut it short
and add 30 or 40 meters of rope (which will also spare some weight forward); on
Shaula3 we had a similar arrangement, and very seldom we had to pay out the
rope, although in the Pacific anchorages in deep water are rather commonplace. KEEL PLAY AND KEEL-LIFTING MECHANISM:
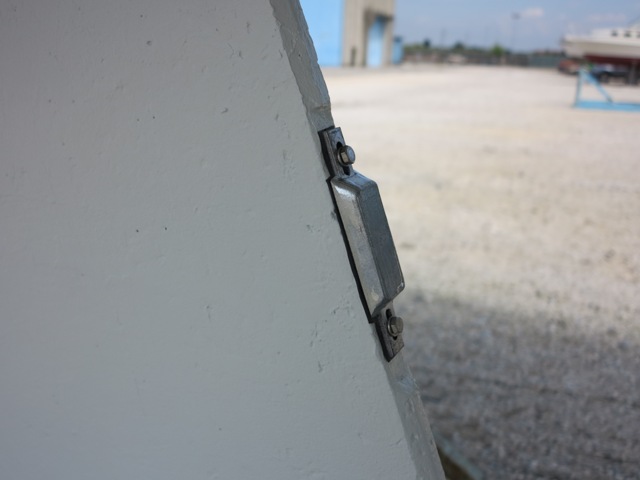
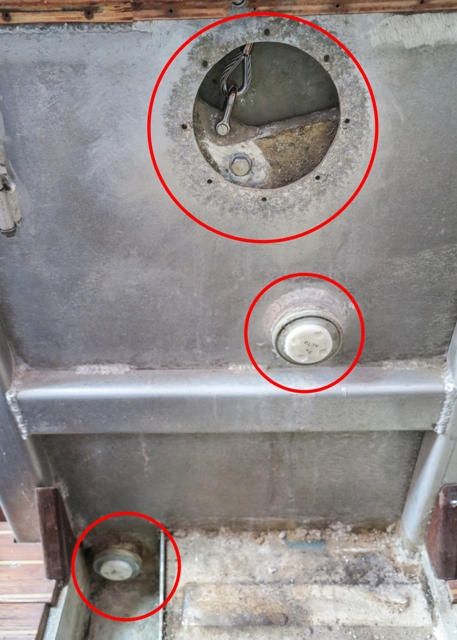
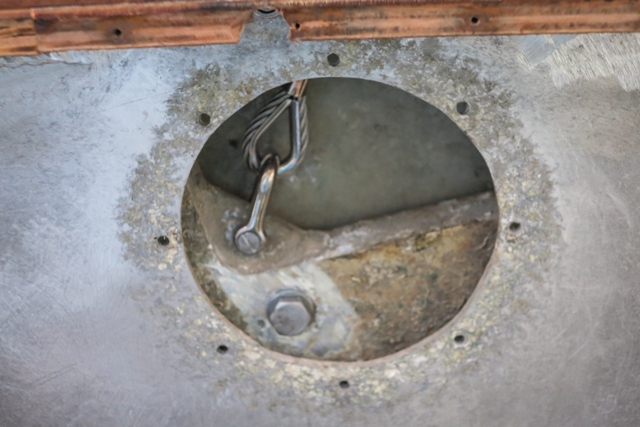
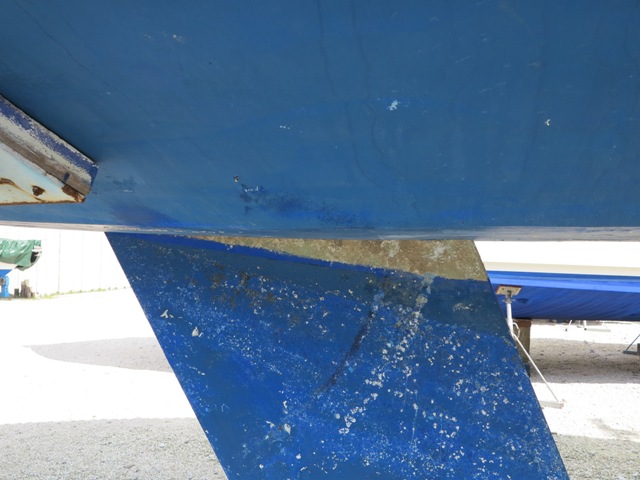
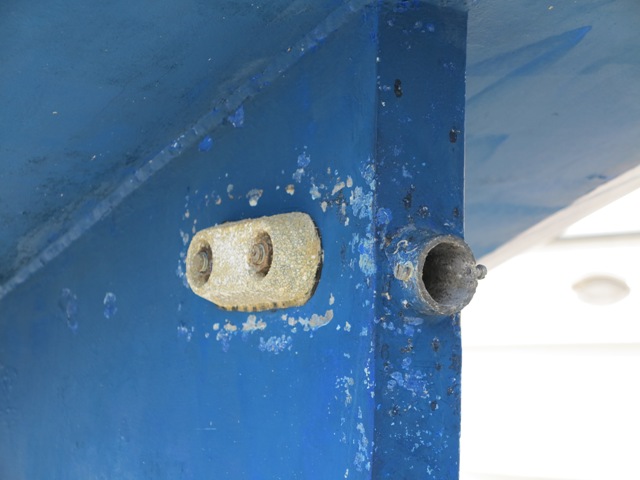
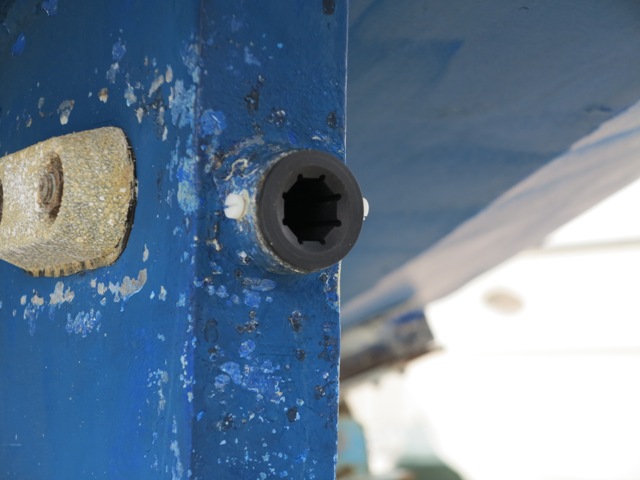
On the keel-box side, the play-recovery screws and the lifting cable access hatch The custom tool to turn the setting screws The keel's violent shaking during last year's transfer trip
worried us a lot: we were afraid of finding a worn-out or destroyed mechanism
requiring a major repair! Furthermore, the lifting cable was broken
and poorly patched-up and the keel was not lifting more than half.
The keel lifting cable's attachment point At last, the keel now can retract fully! Cable replaced (40 Euros of expenditure! The one for Shaula3, which I bought from Alubat costed 5 or 6 times as much!!), it took 3 days of trial-and-error and careful file work to get a reasonable compromise between limited play with the keel down and the ability to lift it! Still to be tested in actual navigation, but I'm optimistic: huff, one less worry!!
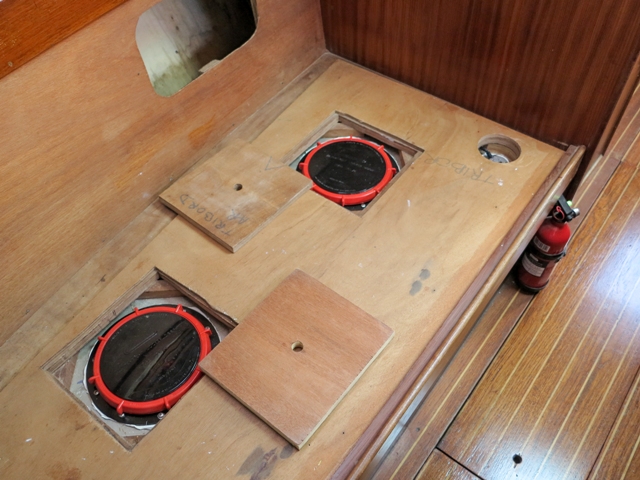
PROP-SHAFT MAINTENANCE: On this boat the prop-shaft can be taken away only when the engine is not in place, so we take the opportunity to perform a bit of maintenance!
Out with the prop-shaft and the old bearing..... and in with a new cutless bearing! We take the opportunity also to have the propeller-pitch
reduced: according to the mechanic, our engine has been over-worked, probably
due to a propeller which was too "long": some checks with propeller-calculation
programs seems to confirm that, so we have the pitch shortened from 10" to 8".
Let's hope this is the right thing to do, as it will not be possible to revert
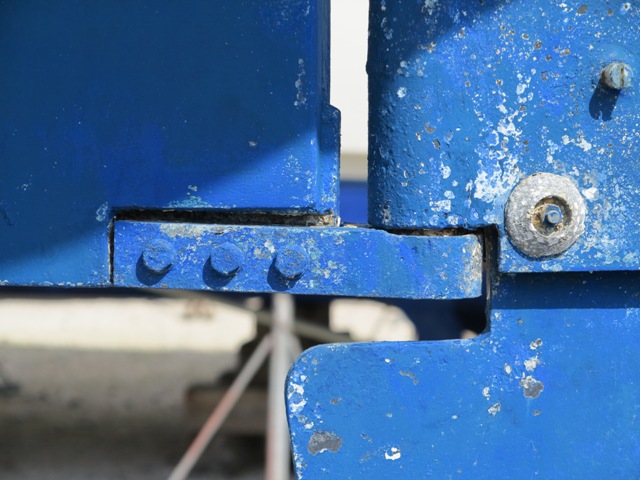
the modification! RUDDER SUPPORT: Probably it's not very critical, but the lower rudder-support is visibly at an angle, possibly due to bolt-holes having become oval: 10 minutes with a drill, making larger holes in the right position, and the support is straight again!
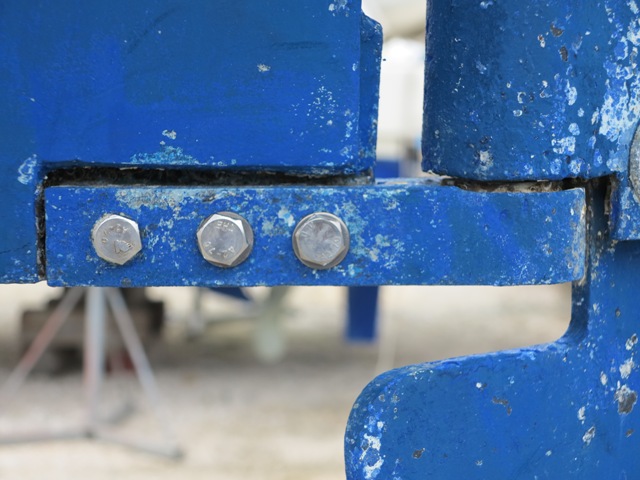
The rudder support is
visibly out of alignment...
problem easily solved! BOW ROLLER AND ANCHOR CHAIN:
We set apart a 10-meter segment of the discarded chain, to be later used with the spare anchor; the rest is good for throwing away. The new rollers and the
anchor-locking pin GAS-BOTTLE HOUSING:
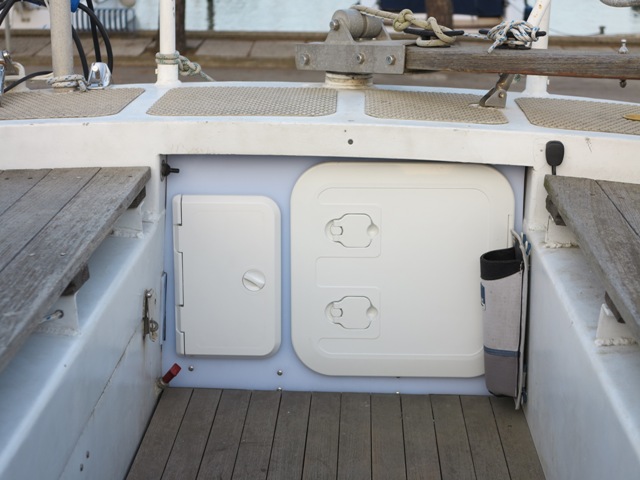
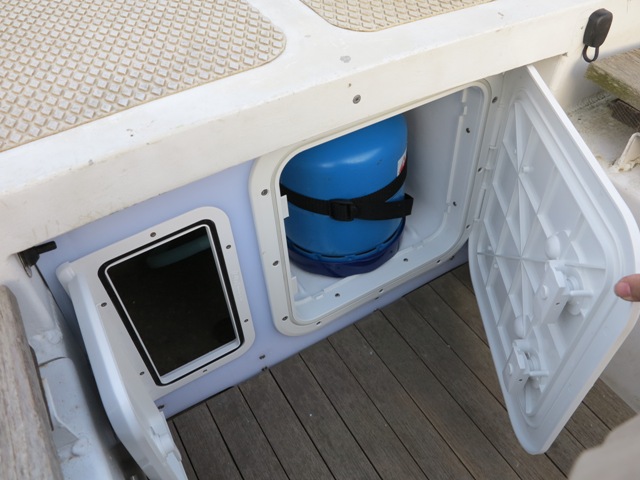
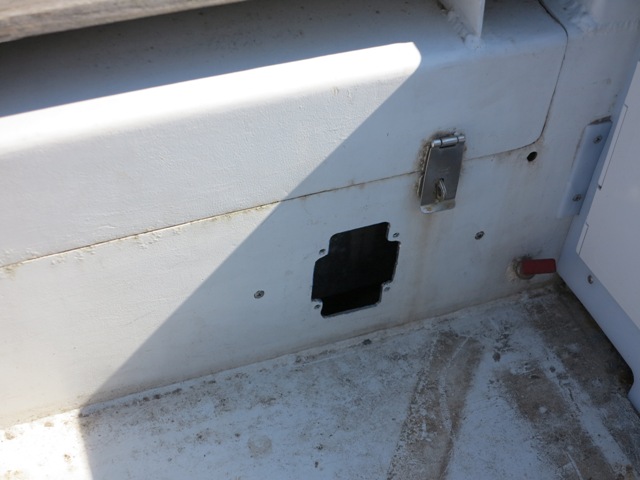
The awful-looking lazarette at the stern has been converted into the gas-bottle housing
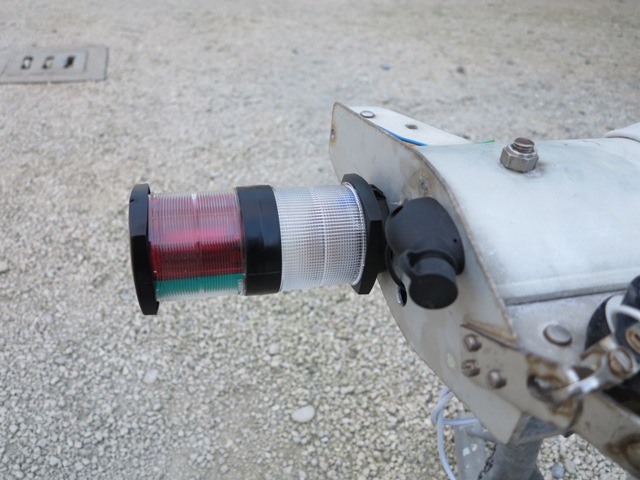
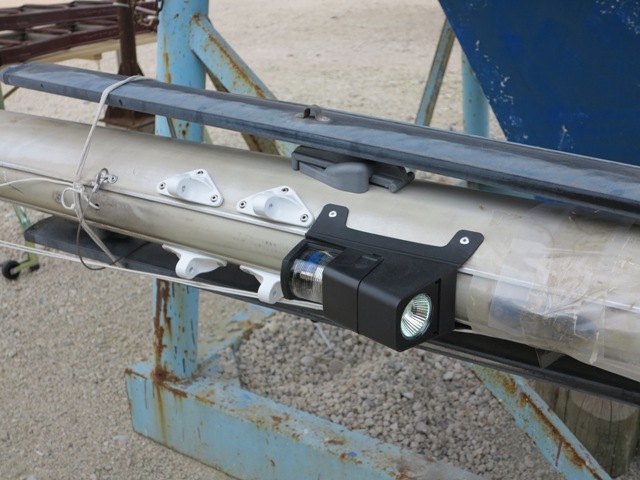
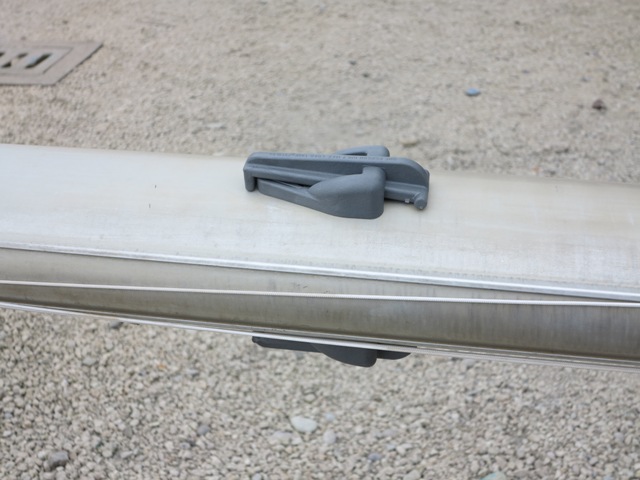
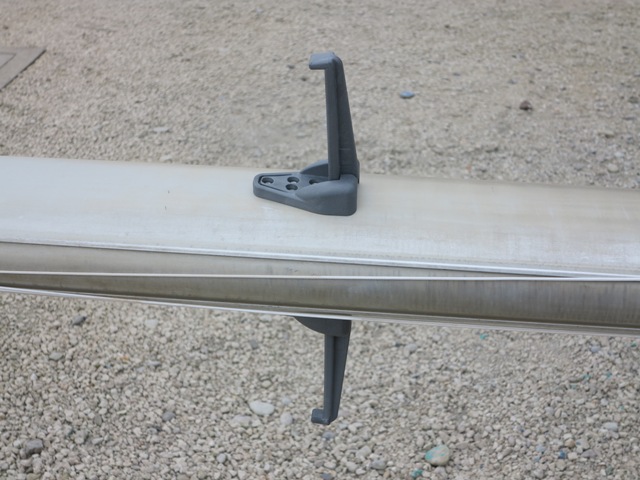
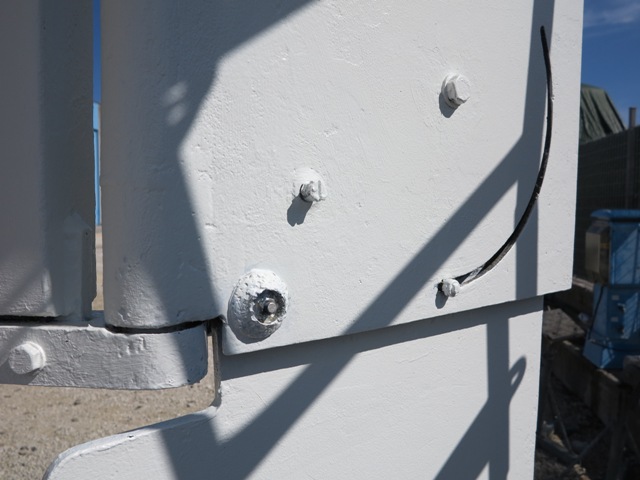
We must take advantage of the mast being down to install a series of accessories and their cablings: we begin with the mast-head tri-colour light, together with the wind-transducer's support and cabling and the VHF aerial's cable, then continue with the radar antenna support and the mid-mast light.
The steps in closed position..... and open
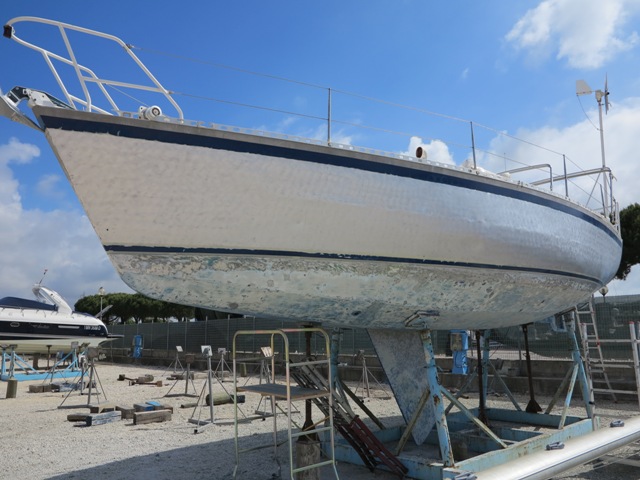
Time is rapidly going-by, and if we want to put the boat back in the water it's becoming urgent to clean the topsides and to remove as much as possible the old anti-fouling paint.
A month of hard work!! The dark oxide layer covering the top-sides does not come off easily, we have to resrt to the heavy-calibres (namely a very powerful - and heavy! - angle-polisher to remove the dirt, followed by a gentler roto-orbital polisher to give that "little circles" finish which is so typical of metal hulls (we actually hope it will hide the little faults that we could not remove altogether!). Removing the old anti-fouling paint turned out to be even
worse: on Shaula3 we had good results using an electric-scraper, but this time
the result was disappointing, and we had to do a second run sanding the whole
surface, and lastly sand-blast the more critical surfaces like hull and keel;
the end result is good, but it took a lot of time and effort! PAINTING: We begin with the hull bottom, primer, base layer and then a first layer of anti-fouling, then we stop to go back home to vote for the European ballots. When we will be back, we will begin with the blue stripes on the hull and the white paint on the stern. Deck, roof-top and cockpit will probably have to wait, as they are not pre-requisites to put the boat in the water!
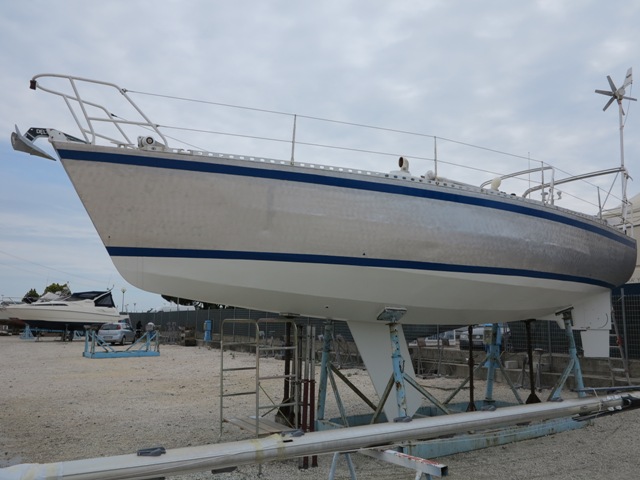
Polished hull, new white antifouling paint, blue stripes repainted, and the boat's look is quite improved! More than a month of hard work, but at least the result is
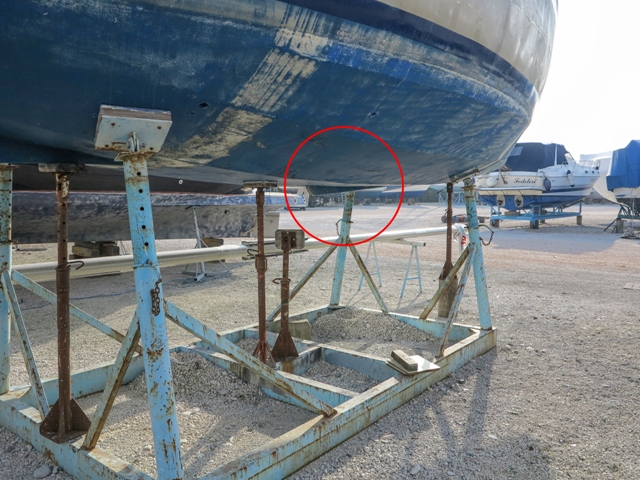
plain visible! KEEL AND RUDDER: When we scraped off the old antifouling, we discovered that
the signs of electrolythic corrosion that we noticed last year during the
pre-purchase inspection are in fact more serious than first noticed; luckily,
there is absolutely no trace of corrosion on the hull (this would have been a
red light for the purchase!!), so we suppose the corrosion might be caused by
the stainless-steel keel-lifting cable.
(left) the new anode on the keel's trailing edge (right) the new screw to limit the rudder blade's play Also the rudder, just like the lifting-keel, has a system to
limit the oscillation of the lifting section around its pivot, by means of 4
large nylon screws. One of these screws is not turned down enough
and is allowing the rudder far too much play. We take the opportunity to dismount the rudder's mechanism,
hoping to sort out the lines which are supposed to lift and pull down the blade:
it does not work well, but now at least the blade can move and can be kept
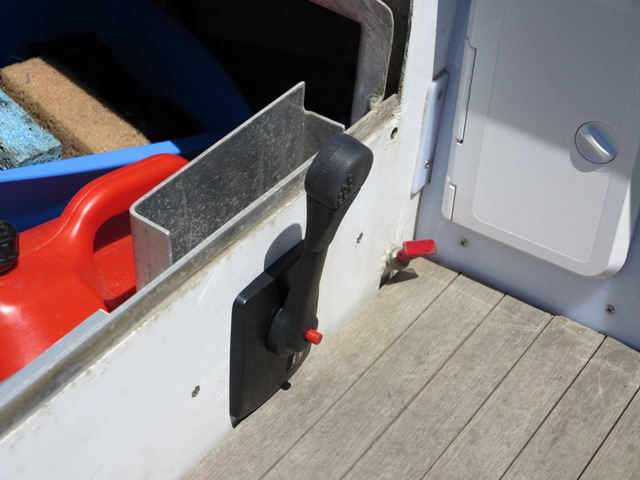
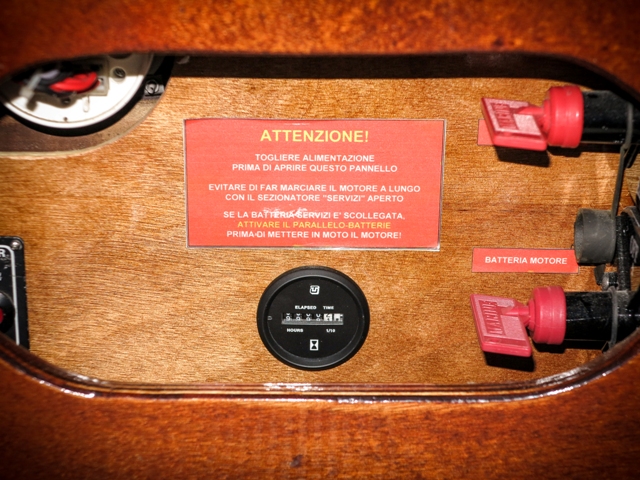
firmly in the lowered position! ENGINE REMOTE CONTROL: The original placement of the engine controls was not very practical, half-hidden under the after-deck, and was forcing the helmsman to kneel down to engage reverse gear, losing sight of what was happening around the boat; the closing of the space under the deck at the back of the cockpit, transformed in the housing for the gas bottle, gave us the excuse to give a new position to the control lever, and like usual we had to replace the control itself, as the old one was refusing to let being dismantled...
The new hole for the
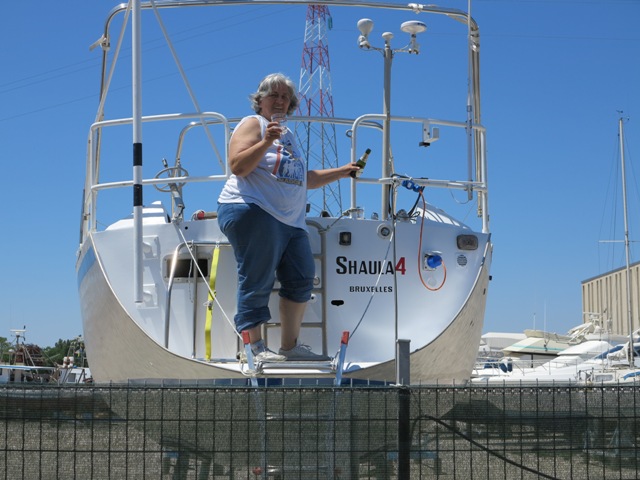
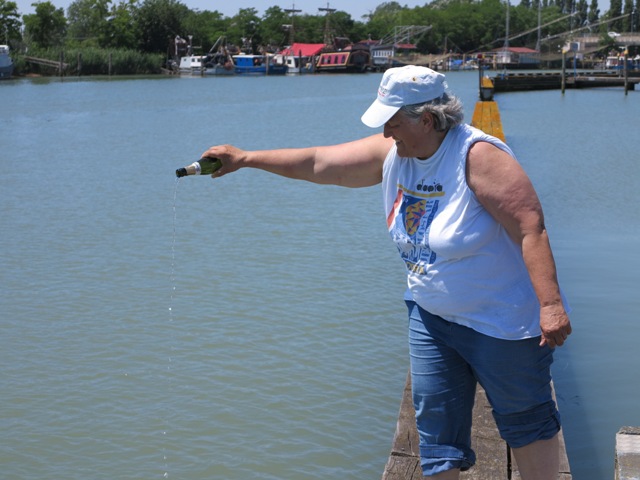
teleflex control, relocated about 30 cm forward of the previous location RENAMING CEREMONY: SHAULA4 IS (officially) BORN !! Although the new name was in the new Belgian papers (did you notice that I never mentioned the old name on this website, didn't you?), we were waiting for the repainting of the stern to apply the new name and proceed with the "official" naming ceremony!
A toast to the new name... ...with a share for god Neptune! Obviously the renaming must follow the rules set by tradition (see this page), which include a toast to the sea and wind gods! We followed this same procedure with Shaula3, and we can say it worked and the gods were benign!...
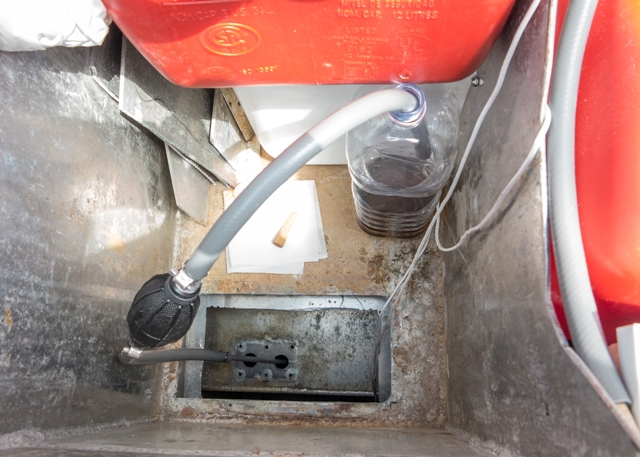
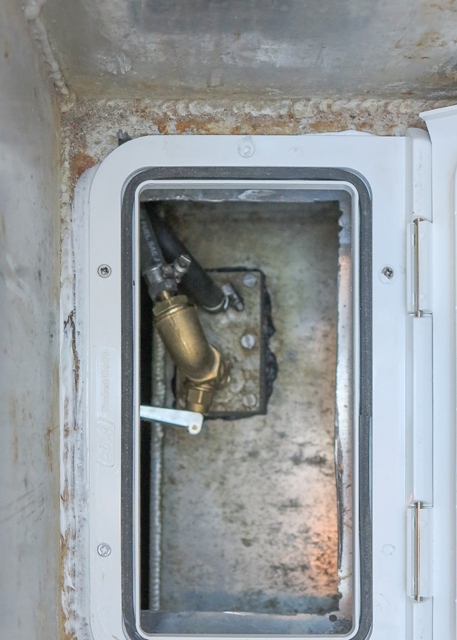
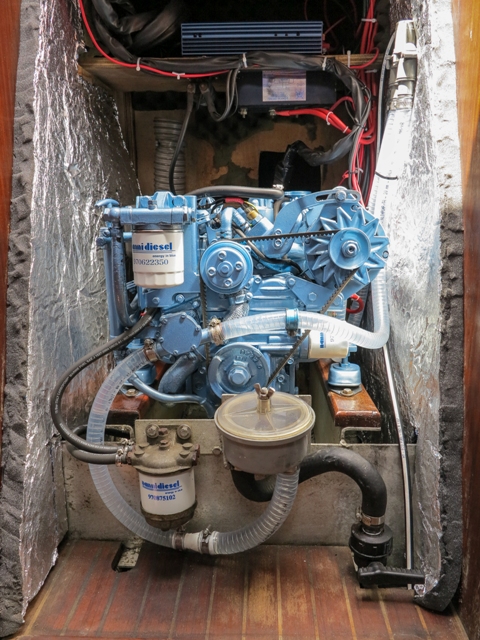
Last mandatory job before putting the boat back in the water and reinstalling the engine and the mast: clean the engine bay, replace all pipes and hoses, empty and clean the fuel tank and take the opportunity to install a level-sensor which is currently not existing.
The last drops are pumped out of the tank with
the help of a long pipe attached to an outboard's hand pump As a demonstration that a level-indicator would be useful, it took more than 1 day to empty the tank of all fuel because, contrary to our memories, it was nearly full! At least, one good new: the fuel in the tank is spotlessly clean!
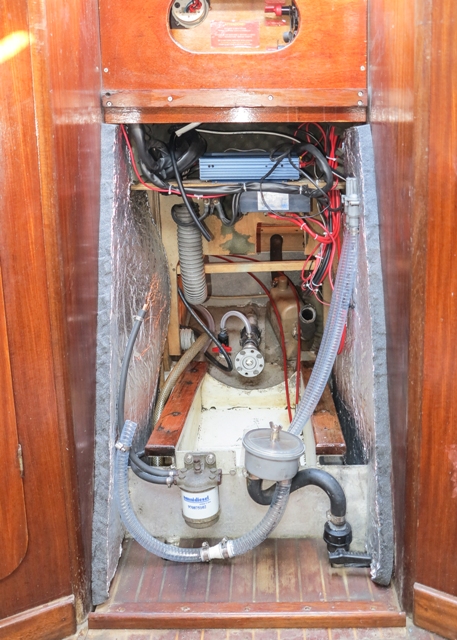
The engine bay,
cleaned, painted and with new hoses and new padding
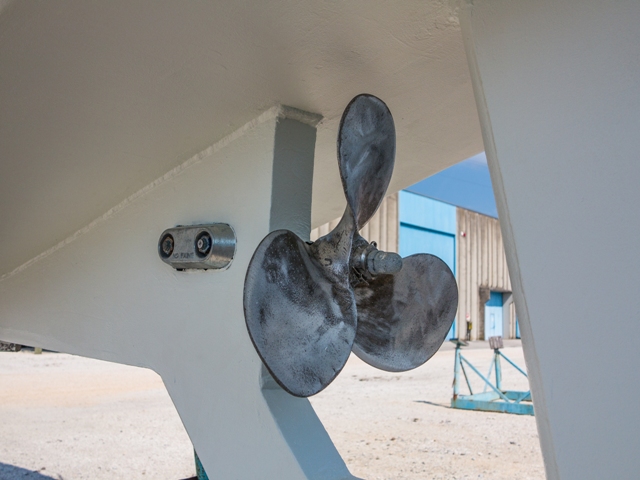
new fuel tap with remote-control lever PROPELLER AND ANODES: We reinstall the propeller, whose pitch has been shortened by about one inch, and we put new anodes in place.
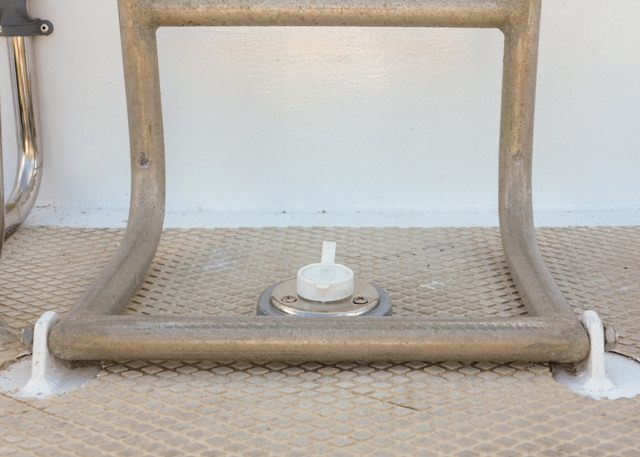
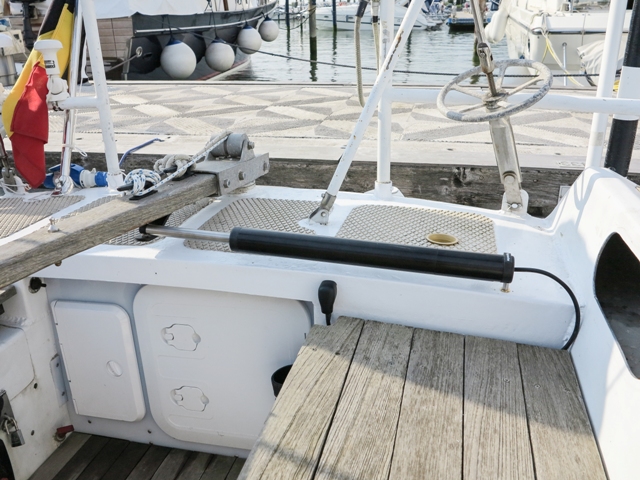
We install a socket for the new telescopic passerelle which, when collapsed, takes a very limited space in the cockpit locker.
The passerelle socket
on the stern platform...
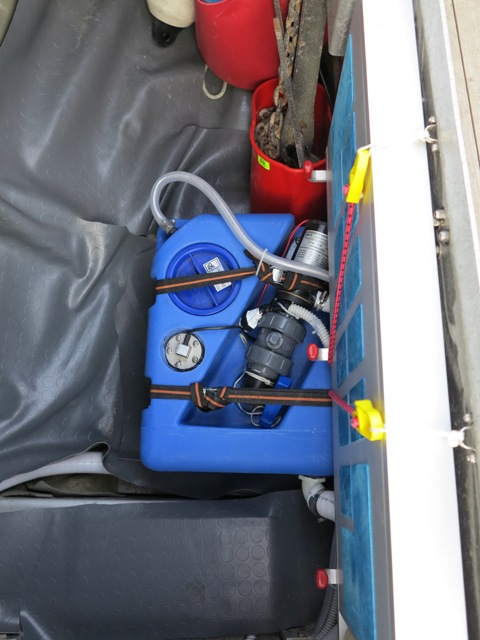
...and the passerelle itself, stowed in the cockpit locker BLACK WATERS TANK: Many Countries are (rightfully) forbidding the discharge of toilet waste in ports or harbours, and this implies the presence of a waste-water tank to store the discharge from the WC. The new tank, complete with electric discharge pump, is lying since several months at the bottom of the cockpit locker, but all the pipes and the electrical connections are still waiting to be done. The pipework at the back of the toilet bowl has become quite more intricate than before, but we have very little options here, due to the limited space.
The new pipework with the links to the black-waters tank The tank sitting at the bottom of the cockpit locker
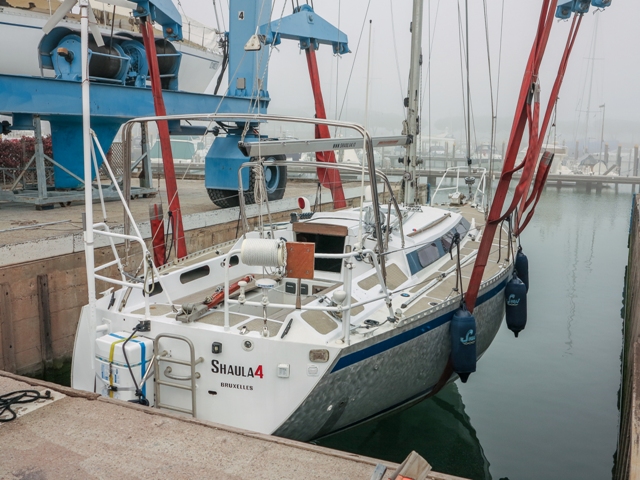
After having launched the boat, we go under the crane that will put the engine back on board:
The engine returns!... It looks like new!... Looks like new, indeed, but it does not work! Or more exactly, it does not run smoothly, and stops altogether every now and then! We are all too familiar with these symptoms which bothered us for weeks on Shaula3: the fuel is not flowing! A quick test, connecting the fuel inlet to a jerrycan,
confirms that the problem is not due to the pipes coming from the tank, which
leaves only the fuel pump as a possible culpright; it will need to be ordered,
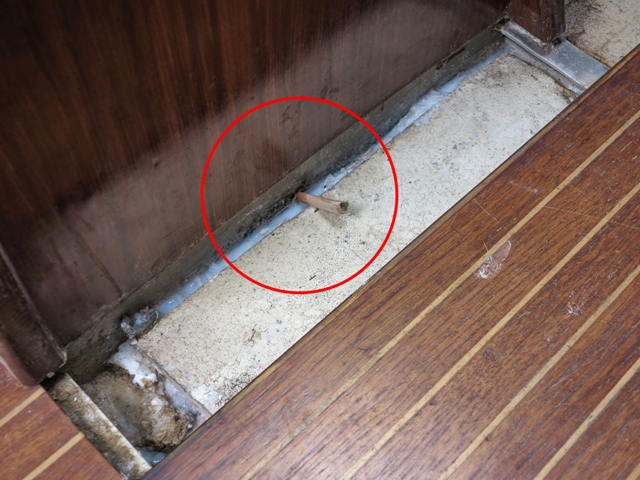
and this will take some days. WE GOT A LEAK!! While he is working on the engine, the mechanic hears water flowing, like from an open tap: we lift the cabin floorboards, and we soon discover a small hole on the side of the keel-box!! A wooden bung, hammered in the hole, takes care of stopping temporarily the water flow, but we have no choice: after having reinstalled the engine and the mast with the new rigging, we return under the travel-lift and we put the boat back on the ground.
The hole on the keel-box.... ...and Shaula returns on the hard for the repair Initially, we thought to perform the repair by soldering, but the specialist advises us against: the position of the hole is awkward, it's not easy to make a proper soldering, and applying a reinforcement is even less easy. He advises to use epossidic resin instead, and in the end this is the way we decide to pursue. First of all, we close the hole with an epoxy mastic, then
we fill all the smaller holes in the area with an epoxy filler, then we
force a wooden bung at the back of the hole and fill everything with epoxy
resin: it should last forever! BACK IN THE WATER!
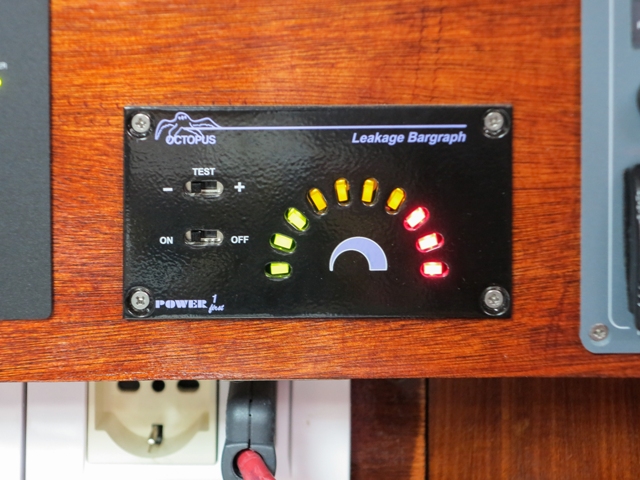
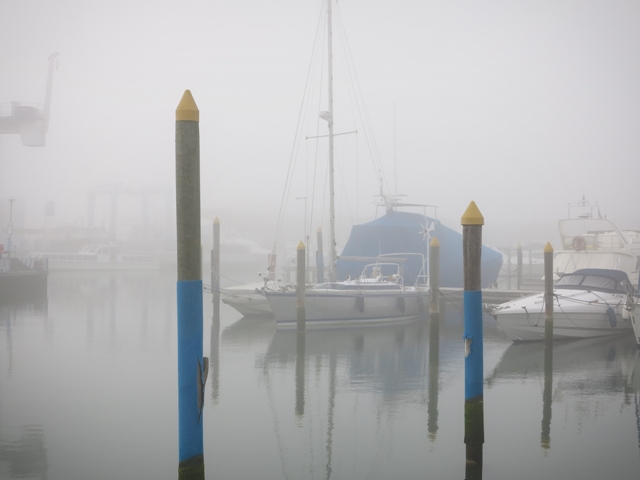
At last, Shaula4 is tied in its place! WE HAVE A LEAK! (an electrical one this time...) Now that the mast is up, we can proceed running the new cables and then connect radar, VHF aerial, wind transducer and lights, both at mast-head and mid-mast. We try and switch everything on, and....
the leak-warning jumps at full scale!! Bu**ger!... Last we checked, few days ago, the leak was not there, so it must have been caused by one of the devices we just installed, but the search for the culpright turns out to be not easy; after much sweating, we discover that the problem is caused by the radar which is not shorting to ground its own power supply, but puts to ground the cable coming from the Seatalk-hs network (one of the 3 - I said three - networks required by the Raymarine instrumentation...). It would be nice if Raymarine gave any indication as to how to
connect their instruments on a metallic-hulled boat, but they don't say a word;
anyway, we disconnect all connections to ground, and the problem disappears; a
quick test shows that everything is working all the same... AUTOPILOT: Sailing short-crewed an auto-pilot is a precious extra hand, therefore we install a state-of-the-art Raymarine control unit, integrated with the instrument network. Pity that there is no way to install a "serious" actuator of the "always connected" type as the one we had on Shaula3, and we will have to make-do with a "small-boat" actuator which must be connected and disconnected manually from the tiller when we switch the pilot on or off. OK, we had the same solution on Shaula2 for many years, it's less practical but workable!
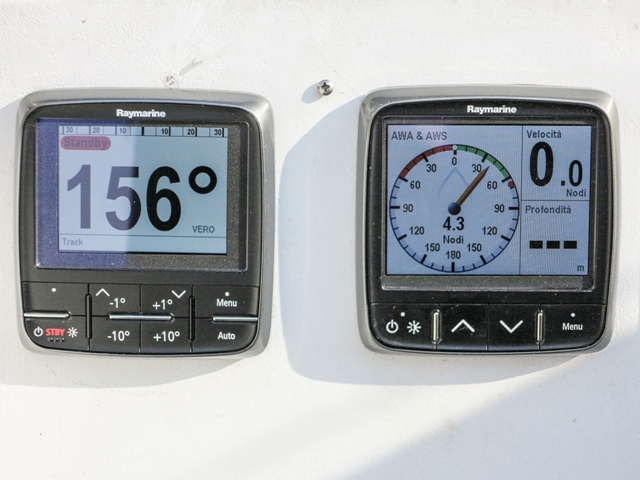
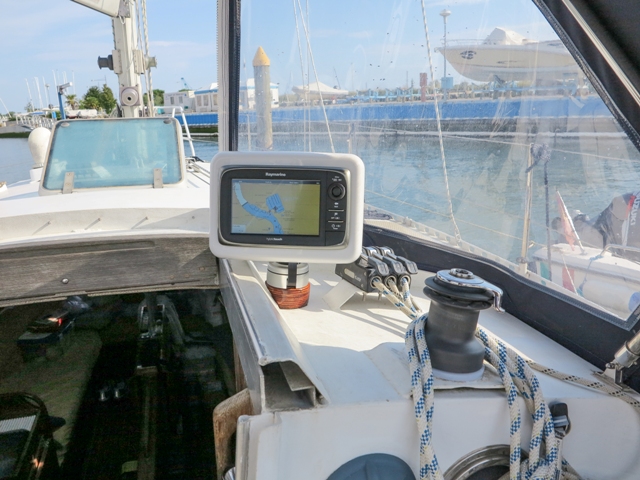
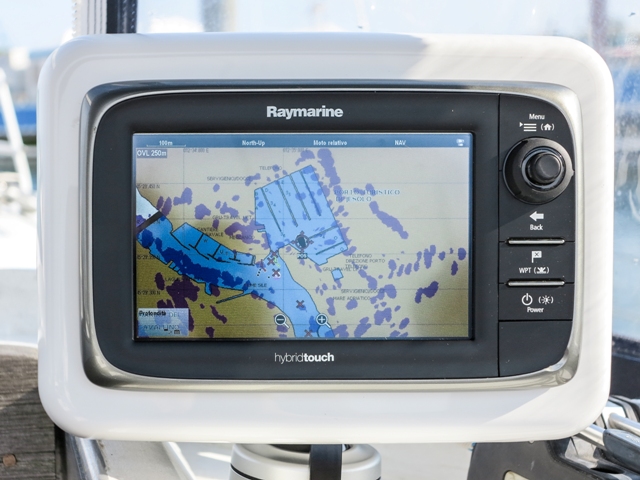
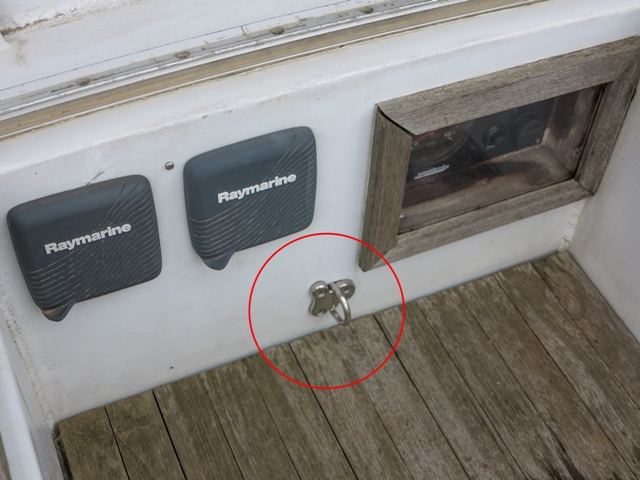
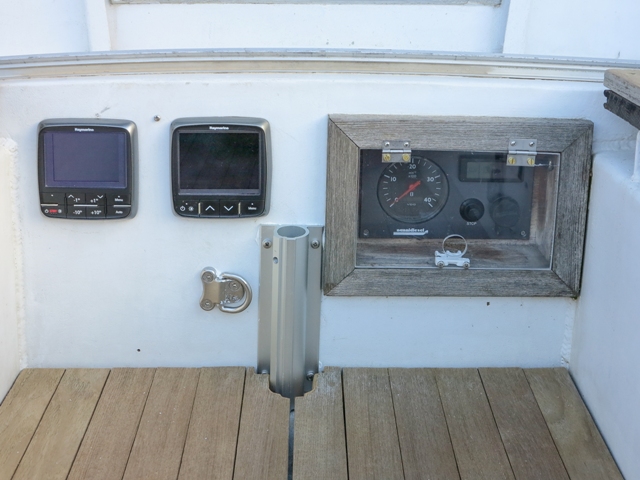
The autopilot actuator, connected to the tiller The networked instrument- and autopilot-displays CHARTPLOTTER IN THE COCKPIT: Sailing short-handed, quite frequently only one person is in the cockpit, and having a chartplotter/radar display at hand is very convenient; furthermore, being the device identical to the one installed under-deck, they act one as a reserve to the other and having an internal GPS receiver the one in the cockpit can also act as a spare to the main GPS receiver.
Il display multifunzione installato sulla tuga,
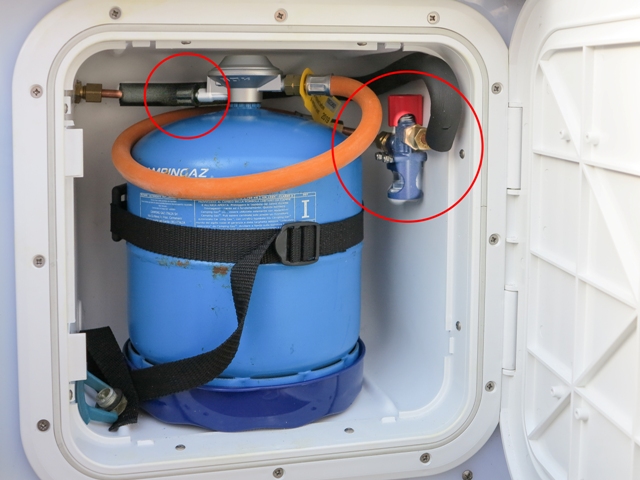
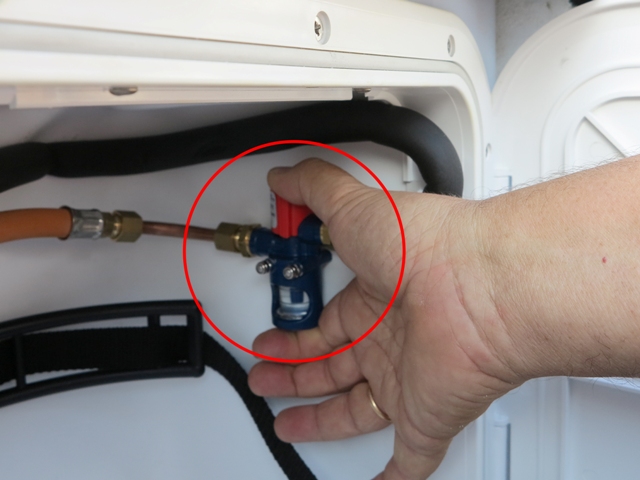
ben visibile dal timoniere sia in modalità chartplotter che radar GAS SYSTEM: Needless to say, the existing gas system was not compliant to the latest regulation and was not working well either, we have never been able to turn on more than one burner at the time, and even that only after a complex voodoo rite!! Everything off then we install a new bottle-locker opening to the outside and vented out of the boat, and then we completely re-run the pipework to the oven.
The gas-bottle locker the bubble-leak tester The oven was already replaced last year, and at last with the new pipes everything works!!
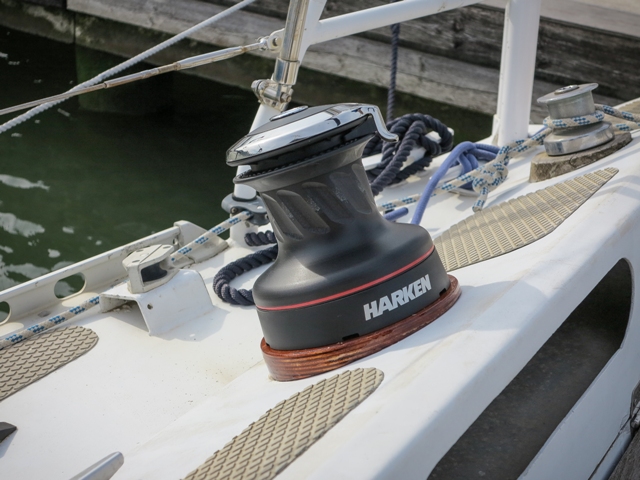
The oven, fed through an internal safety valve SHEET WINCHES:
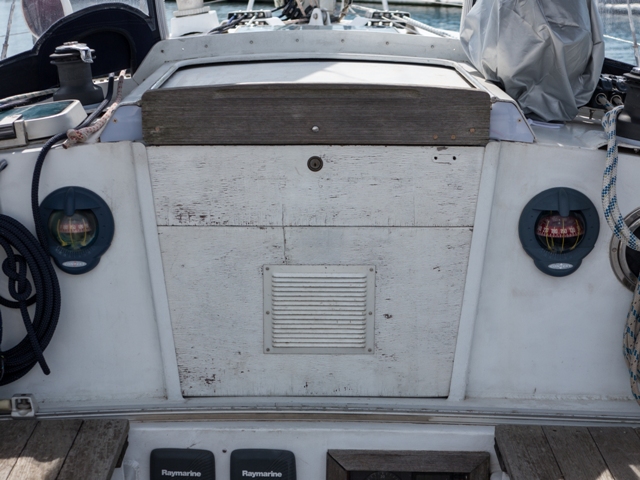
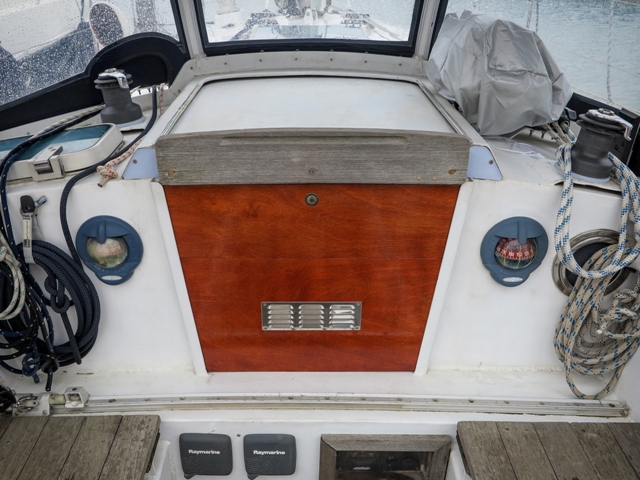
COMPANIONWAY ACCESS: The panel closing the companionway was worn and painted white; we would have liked to install a perspex panel, but it's hard to find the right thickness and it must necessarily be machine-cut to specification, making the whole thing rather expensive. We settled for a new, freshly painted wooden panel, then.
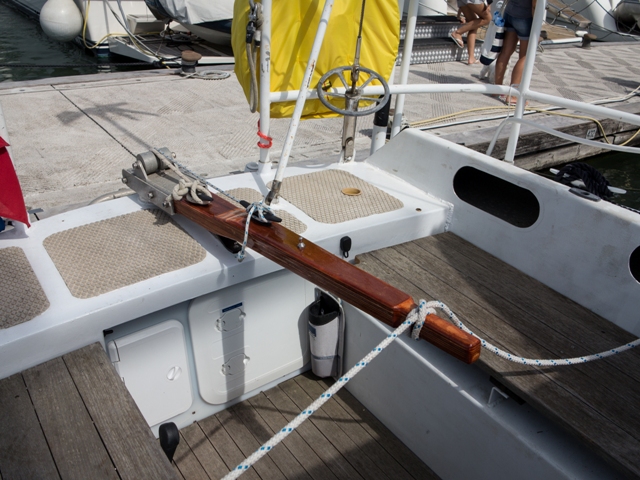
Prima e dopo la cura... TILLER: Also the tiller was very worn-out, so we built a new one.
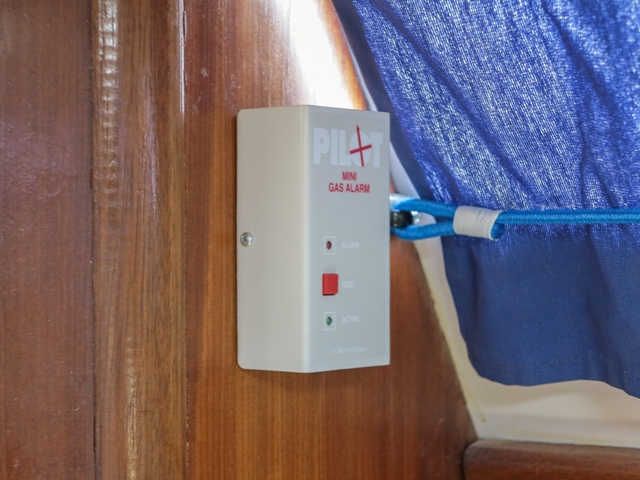
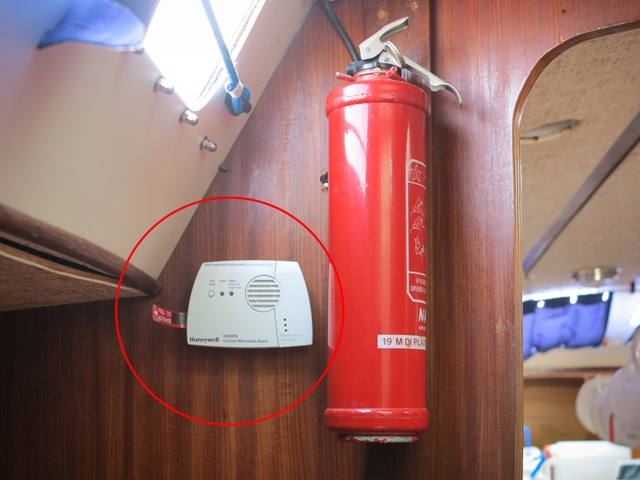
ALARMS: Precautions are never too many, therefore we installed a gas alarm, with its sensor down under the oven, and a Carbon Monoxide alarm, mounted high-up in the stern cabin, the one nearer to the engine.
La centralina di allarme per il gas...
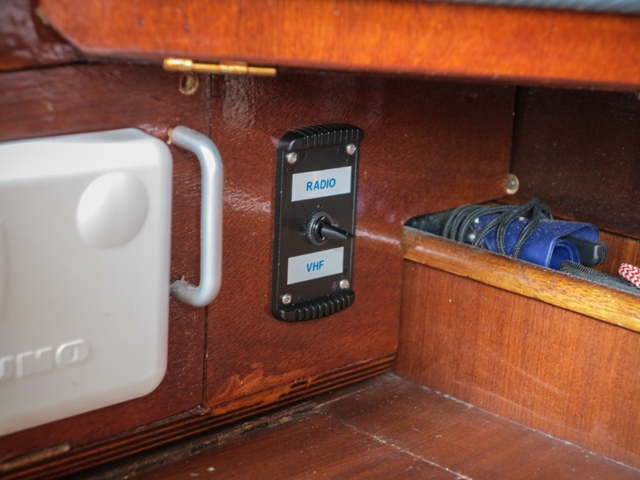
e quella per l'ossido di carbonio COCKPIT LOUDSPEAKER: During the first sea-trials we noticed that when motoring it was impossible to hear the VHF radio, so we installed a waterproof cockpit speaker, with a switch at the chart table allowing to connect to the external speaker either the VHF or the radio/CD player for a bit of music in the cockpit at sundown...
KEDGE AND ROPES: We found the kedge (a pretty substantial thing, which is not a bad thing per se...) stored in one of the few cabin lockers, in a space that could be put to better use and anyway impractical for a quick deployment, so we gave it a room in the cockpit locker and completed it with a length of chain and 30 meters of rope for a quicker deployment.
While we were there, we also
installed a couple of cleats in the cockpit locker, to hang some mooring lines,
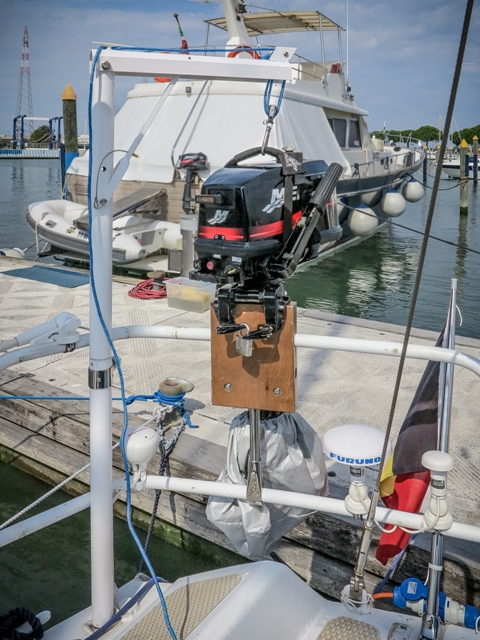
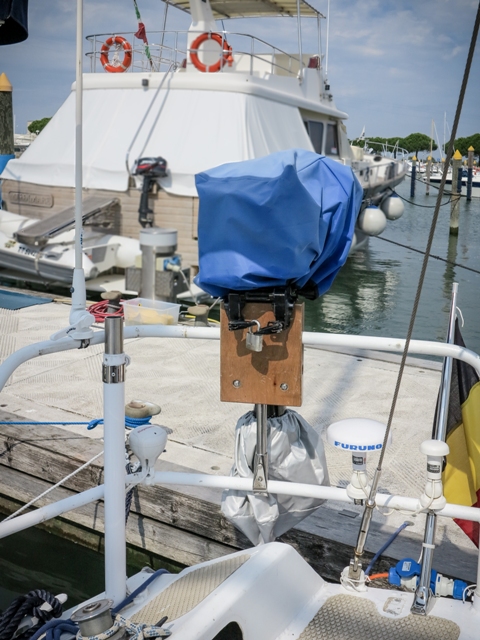
ready for quick use. OUTBOARD CRANE: Since the times of Shaula2 we adopted a dismountable crane by Osculati to lower the outboard to the dinghy and vice-versa; we could not avoid having the same also on Shaula4, in view of the expected frequent dinghy trips during our forthcoming extended cruises...
The assembled crane,
ready for use...
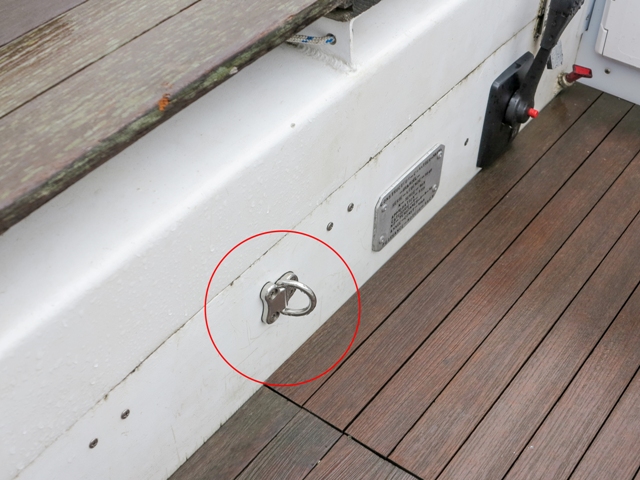
...and what's left with the crane dismounted COCKPIT STRONG-POINTS: When we are in the cockpit, at night or with bad weather, we wear our self-inflatable life-jackets with integral harness, which we tether to one of the strong points in the cockpit.
The strong-points at
the cockpit side...
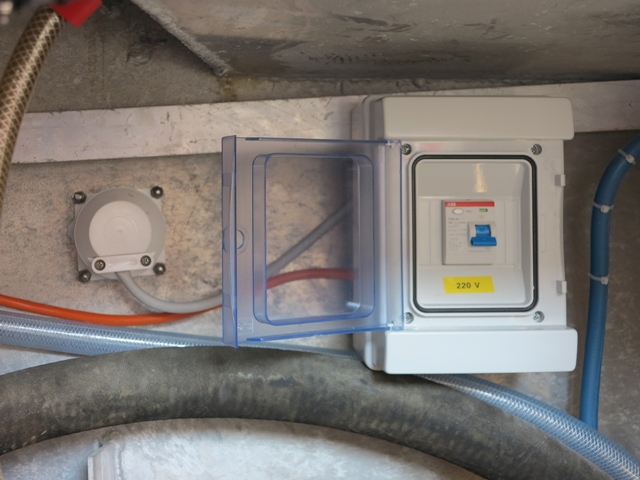
...and front RCD: It would not be needed, because there is already one on the main AC distribution panel, but the rules require an automatic switch not more than 50 cm from the mains entry point into the boat. We had already an RCD (Residual Current device) left-over from last year's temporary switchboard, so we made good use of it!
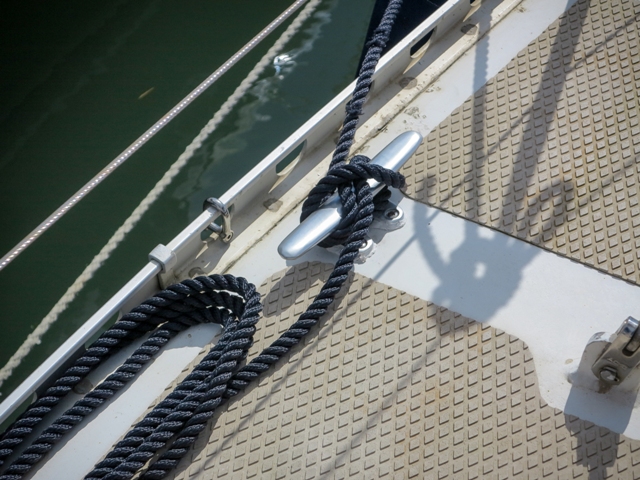
MID-SHIP CLEATS: Oddly enough, for a French boat, there are no mid-ship cleats, very handy for springs to be used when mooring alongside or at fingers, not very common in the Med but very popular in tidal ports, so we added them!
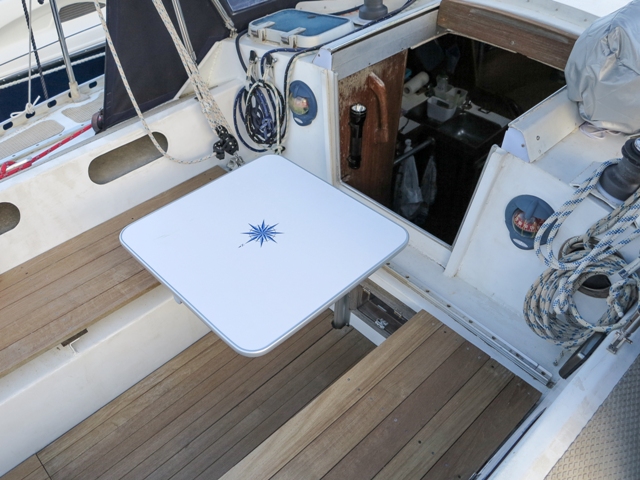
COCKPIT TABLE: A cockpit table is always very useful to dine alfresco in the cockpit, but unfortunately we miss the steering pedestal that would be a very handy attachment point. We must therefore make-do with a removable table:
The table support...
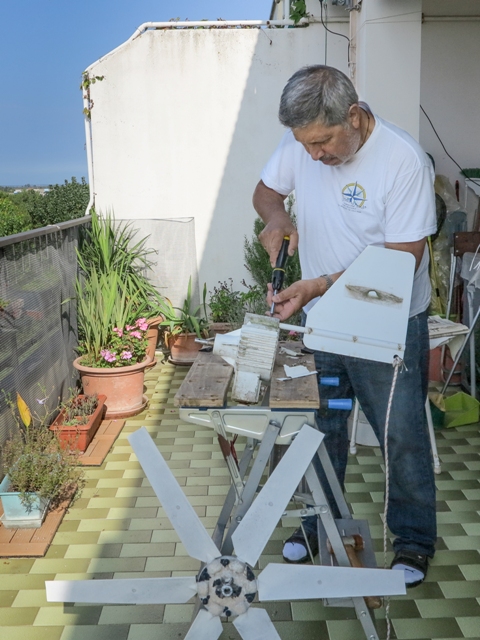
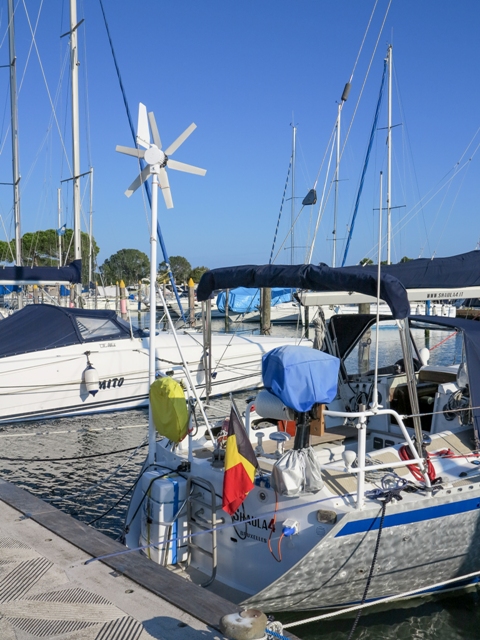
...and the installed table AEROGEN: The Aerogen-4 wind generator that was installed on the boat is rather worn-out and is installed on a pole which is too high, requiring one to climb on the pushpit in order to stop it, a rather dangerous feat when under sail! While the generator was incurring in some well-deserved maintenance, we shortened its pole by about 50 centimeters; it's still too high, but we preferred to keep the rotating blades higher than anybody's head!
We disassemble the
wind generator....
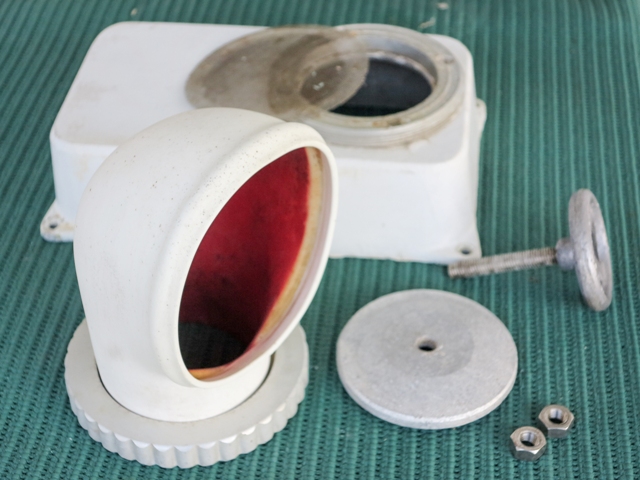
...to reassemble it on a shortened pole VENTS: The two dorade vents on the coachroof would be quite useful, if they weren't completely blocked by oxidation; taking them off has been a tough job, but at the end we made it, and now the vents work perfectly!
HOUR-COUNTER: The VDO hour-counter which is integrated in the rpm-meter on the engine dashboard does not work (surprise surprise! it was not working on Shaula3 as well!!) and replacing the instrument would be very expensive, besides the risk that it will fail again, so we opted for a dedicated, no frills hour meter.
PAINTING JOBS: When we bought Shaula4 our first impression was of a lot of paint jobs to be performed both inside and out; other more urgent works were soon discovered, pushing painting down the list of jobs to be done, but now that most serious works have been finished we can put hand to the brush (or roller, actually...) and begin addressing the more worn-out areas such as the coachroof and the cabin descent.
We begin painting
above deck...
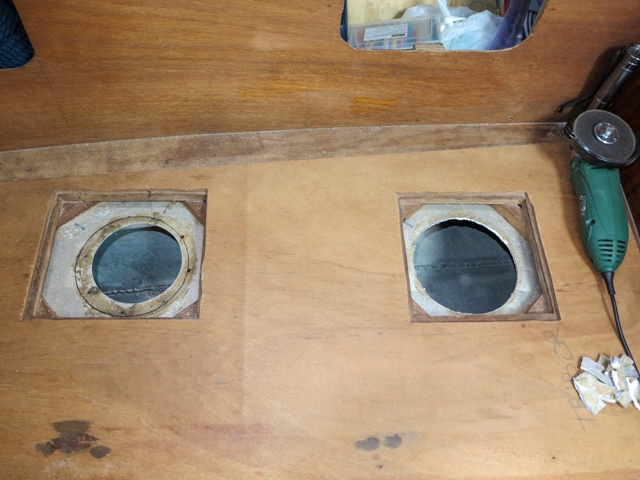
...and in the cabin WATER TANKS: The last major system that needs our attention is the fresh-water system: for reasons that we can partially guess, the first owner disconnected the integral fresh-water tanks, which were exposed to corrosion (a well-known problem that only aluminium-boat manufacturers stubbornly deny...) and replaced them with...two 60-liter jerrycans, placed under the forward bunk! Understandable, but 120 liters instead of 400 is really too little for an ocean-going yacht, even if we had a water-maker which we do not have...
We cut wider inspection holes... ...to accommodate the new screwed-on caps After having thought about possible alternatives, we decided to put back in service the original tanks, with a few modification and painting their interior with a specific epoxy paint to prevent corrosion; furthermore, we installed new screw-on inspection hatches to make inspection and cleaning easier. We still have to run the new pipes, a job for next spring yes because...
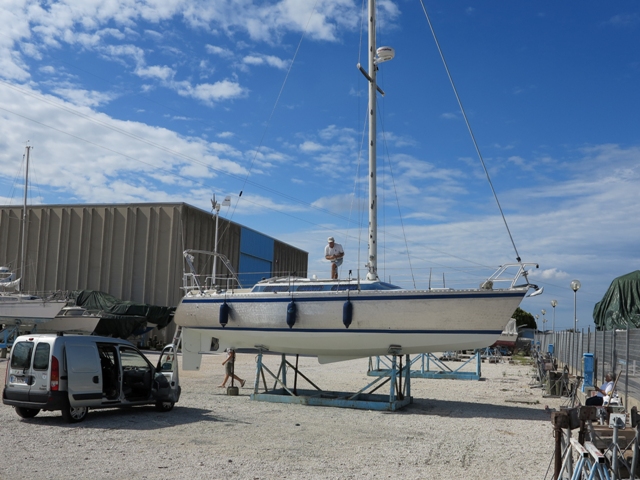
BAD WEATHER HAS COME! Time to lift the boat out for winter:
THE SEASON IS OVER, WE GO BACK HOME!! CONTINUE reading about the
2015 WORKS
|
|
Webmaster: Gianfranco Balducci - email: gfbalduc@tin.it Last Update: 07/09/2017
The
Shaula4 website (text and images) by Gianfranco Balducci is licensed under a |
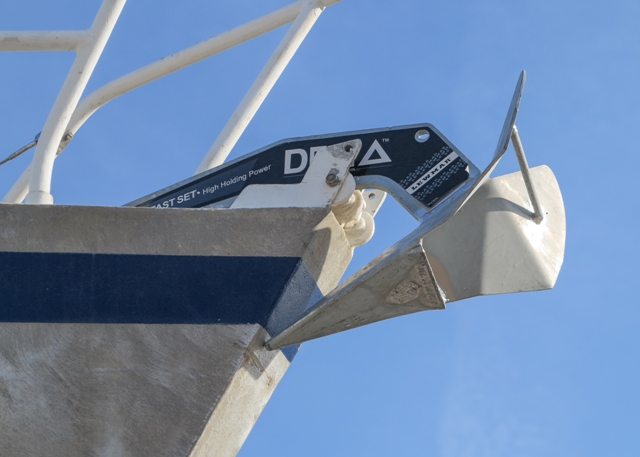

 The
lips of the bow-roller are a bit bent, so the wheels did not turn freely and
have been worn-out over time; we also must replace the last 30/40 meters of
chain, which is badly worn, with a length of rope: less weight, also in view of
the fact that putting out more than 60 meters of rode is very rare!
The
lips of the bow-roller are a bit bent, so the wheels did not turn freely and
have been worn-out over time; we also must replace the last 30/40 meters of
chain, which is badly worn, with a length of rope: less weight, also in view of
the fact that putting out more than 60 meters of rode is very rare!